
C++ Fast-track for Games Programming Part 2: The Template
As you noticed in the first article, setting up a project in Visual Studio can be quite a task. And we didn’t (nearly) touch all the settings that you can adjust for a project either. To make your life a bit easier, we will use a project template from now on. This template is simply a directory that contains all the files that you need, with all the settings tuned just right for the kind of programs that we will be building in this series. The template also contains a bit of code that you need for most projects, so that you don’t have to type it yourself. This code aims to take away the platform specific things from you; i.e. it opens a window, lets you draw to it, and updates it for you. Sounds simple, but really it isn’t. Windows operating system can be quite a nightmare to deal with properly, and since that’s just not the core of game development, we felt it’s best to take care of that once and for all. The result is the template.
Previous Part: Getting StartedNext Part: Variables
Getting the Stuff You Need
Get the latest template package:
 tmpl8-2026.zip
Extract the package to C:\Projects\template (or whichever folder you used for your project in the first tutorial). Then, open the project by double-clicking the tmpl8_2022.sln file if using Visual Studio 2022, or tmpl8_2026.slnx if using Visual Studio 2026 in the directory.
You are receiving this warning because Visual Studio has never seen this project before (it was not created on your computer). The next time you open the same solution file, you will not receive this warning again.
You should see the project in the Solution Explorer now:
Solution Explorer for th tmpl_2019-08 solution.
You should see the files in the project: game.h and game.cpp and well as surface.h and surface.cpp, template.h and template.cpp in the template code folder.
If you click the Local Windows Debugger (![]() ) button (F5), you should see a beautiful window with the text “HELLO WORLD” printed in the top-left corner. To emphasise the magnitude of this accomplishment, there is a spinning gun turret drawn on the screen as well.
) button (F5), you should see a beautiful window with the text “HELLO WORLD” printed in the top-left corner. To emphasise the magnitude of this accomplishment, there is a spinning gun turret drawn on the screen as well.
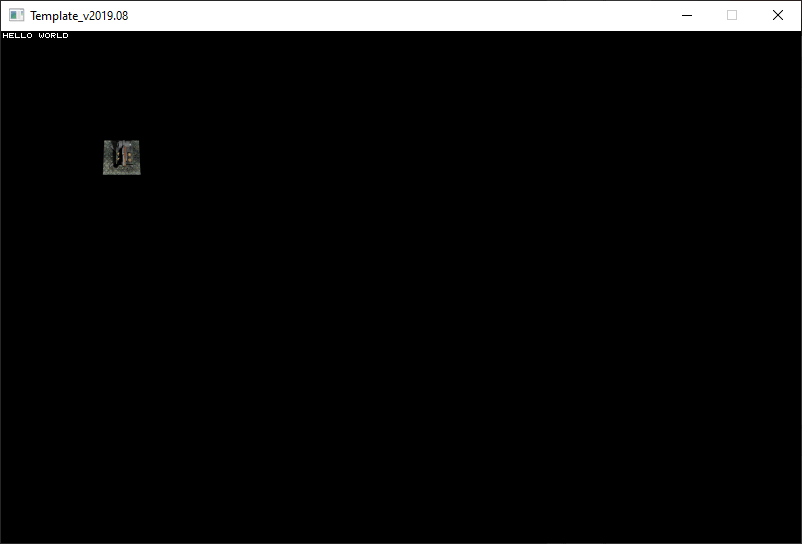
You should see a beautiful window with a spinning gun turret.
The code that you should be interested in right now is in game.cpp. Here are its contents:
|
1 2 3 4 5 6 7 8 9 10 11 12 13 14 15 16 17 18 19 20 21 22 23 24 25 26 27 28 29 30 31 32 33 34 35 36 37 38 39 40 |
#include "game.h" #include "surface.h" #include <cstdio> //printf namespace Tmpl8 { // ----------------------------------------------------------- // Initialize the application // ----------------------------------------------------------- void Game::Init() { } // ----------------------------------------------------------- // Close down application // ----------------------------------------------------------- void Game::Shutdown() { } static Sprite rotatingGun(new Surface("assets/aagun.tga"), 36); static int frame = 0; // ----------------------------------------------------------- // Main application tick function // ----------------------------------------------------------- void Game::Tick(float deltaTime) { // clear the graphics window screen->Clear(0); // print something in the graphics window screen->Print("hello world", 2, 2, 0xffffff); // print something to the text window printf("this goes to the console window.\n"); // draw a sprite rotatingGun.SetFrame(frame); rotatingGun.Draw(screen, 100, 100); if (++frame == 36) frame = 0; } }; |
This code will be the starting point for all episodes of the Fast track tutorial.
Nuts and Bolts
Even though this is just a small program, there’s a lot to say about it. Most (all, actually) of it will be explained in this tutorial series, but for now, let’s limit ourselves to some observations:
- The
#includeline at the beginning of the program basically pastes some source code from another file into the current file. - Whenever something needs to be drawn, a line starts with
screen->. The things we can makescreendo are specified insurface.h, starting at line 37 (class Surface). - There are some things that happen just once. We specify those in the
void Game::Init()function. - This particular program basically does nothing in the
Initfunction. - Other things are done for each frame: These are listed in
void Game::Tick( float deltaTime ). - There’s also a
Shutdownfunction, which gets executed only once: when you terminate the program (e.g. by pressing ESC). - Lines that start with
//are merely comments. The program still works if you remove or alter them.
There’s quite a bit more, and even more when you explore the other source files, such as template.cpp. Feel free to do so; if you mess anything up, just extract the template from the zip file you downloaded at the beginning of this tutorial.
Experiments
Let’s try some random things with this program:
- Change the
0on line 30 to some other number. Make it a big number. - Change the
0xffffffon line 32 to0xff0000. Then, change it to0x00ff00, and finally to0x0000ff. What happens? - Change the
2, 2on line 32 to100, 20. Now change it to640, 20. What happens? - Change
Clearintoclear(lower case) on line 30. Is there a problem now? - Append line 37 to the end of line 36 (don’t remove the semicolon at the end of line 36). Line 36 should now look like this:
36rotatingGun.SetFrame(frame); rotatingGun.Draw(screen, 100, 100);
- Move lines 29-34 from the
Tickfunction to theInitfunction (they do the same thing for each frame anyway, right?). What is the result of doing this?
An important concept is the screen coordinate system. Every pixel on the screen has a position: the horizontal position is called X, the vertical position is called Y. By default, the template opens a 800 by 512 pixel window, so if you draw something at X = 820; it doesn’t fit, and wraps to the left side of the screen (one pixel lower though!).
And finally, there are numbers: 0xffffff (or capitals: 0xFFFFFF) is a number too. In fact, 0x0000FF equals 255. We will discuss this in more detail at a later time.
Console Window
You probably noticed that you still have a console window. This seems quite useless now that we can produce proper graphics, but it may come in handy later. We will use it for printing information that is not supposed to be seen by the end user. This will be useful for debugging.
Assignment
Take a single A4 sheet of paper and draw an 8×8 grid on it. Label the vertical lines from top to bottom: 0, 80, 160, 240, 320, 400, 480, 560, 640. Label the horizontal lines from left to right: 0, 60, 120, 180, 240, 300, 360, 420, 480. Now draw the word “CODE” on this sheet, using straight lines that pass through grid intersection points. Use as few lines as you can; you’ll be translating each line to a line in your program, so don’t make it too difficult for yourself.
Then, for each straight line:
- Determine the
XandYcoordinate of the start of the line (X1,Y1). - Determine the
XandYcoordinate of the end of the line (X2,Y2). - Add a line to the
Tickfunction using thescreen->Line( X1, Y1, X2, Y2, 0xffffff );method.
For bonus points: store the X & Y coordinates in an array and loop through the array to draw the lines.
And finally:
- Make the C red;
- Make the O green;
- Make the D blue, and
- Make the E yellow.
Once you have completed this assignment, you may continue with the next part.
Previous Part: Getting StartedNext Part: Variables
I thought we were going to write a engine! We already get half of it!
Writing a complete game engine is not an easy task. These tutorials are designed as an introductory course for the students entering our games programme (http://www.buas.nl) but they can also be a learning source for anyone. But these are just an introduction to game development.
Sorry, how can I use Sprite in my struct constructor? As I’ve understood I can’t simply write “sprite = newSprite”. So, I’ll be very gratefull to get a solution.
Thank you in advance!
Andrey,
if you have a class or struct that looks like this:
You could construct your entity like this:
Then you could construct your entity in code like this:
or
Does this answer your question?
If I wanted to try and compile your code on GCC instead of MSVS, what would you recommend? It looks like most of the base windows code is recompiled or hidden? Like, there’s no main/winmain function.
ok.. so simplistic.. but it gets code written 🙂
Looks good!
Hello, is it possible to get some documentation or some information on the already written code?
int XCordinate[30] = {0, 0, 0, 60, 0, 60,
120, 120, 120, 180, 120, 180, 180, 180,
240, 240, 240, 300, 240, 300, 300, 300,
360, 360, 360, 420, 360, 420, 360, 420};
int YCordinate[30] = {160, 320, 160, 160, 320, 320,
240, 320, 240, 240, 320, 320, 240, 320,
240, 320, 240, 240, 320, 320, 160, 320,
160, 320, 160, 160, 240, 240, 320, 320};
for (int i = 0; i < 15; i++)
{
if(i Line(XCordinate[i * 2], YCordinate[i * 2], XCordinate[i * 2 + 1], YCordinate[i * 2 + 1], 0xff0000);
else if(i Line(XCordinate[i * 2], YCordinate[i * 2], XCordinate[i * 2 + 1], YCordinate[i * 2 + 1], 0x00ff00);
else if(i Line(XCordinate[i * 2], YCordinate[i * 2], XCordinate[i * 2 + 1], YCordinate[i * 2 + 1], 0x0000ff);
else
screen->Line(XCordinate[i * 2], YCordinate[i * 2], XCordinate[i * 2 + 1], YCordinate[i * 2 + 1], 0xffff00);
}
This is how I’ve done it tho the letters seems to have been drawn on a wrong rotation.
#include “game.h”
#include “surface.h”
#include //printf
namespace Tmpl8
{
// ———————————————————–
// Initialize the application
// ———————————————————–
void Game::Init()
{
}
// ———————————————————–
// Close down application
// ———————————————————–
void Game::Shutdown()
{
}
static Sprite rotatingGun(new Surface(“assets/aagun.tga”), 36);
static int frame = 0;
// ———————————————————–
// Main application tick function
// ———————————————————–
void Game::Tick(float deltaTime)
{
// clear the graphics window
screen->Clear(0);
// print something in the graphics window
screen->Print(“hello world”, 2, 2, 0xffffff);
// print something to the text window
printf(“this goes to the console window.\n”);
// draw a sprite
rotatingGun.SetFrame(frame); rotatingGun.Draw(screen, 100, 100);
if (++frame == 36) frame = 0;
//C
screen->Line(80, 60, 80, 120, 0xFF0000);
screen->Line(80, 60, 240, 60, 0xFF0000);
screen->Line(240, 60, 240, 120, 0xFF0000);
//O
screen->Line(80, 180, 80, 240, 0x008000);
screen->Line(80, 180, 240, 180, 0x008000);
screen->Line(80, 240, 240, 240, 0x008000);
screen->Line(240, 180, 240, 240, 0x008000);
//D
screen->Line(80, 300, 160, 360, 0x0000FF);
screen->Line(240, 300, 80, 300, 0x0000FF);
screen->Line(240, 300, 160, 360, 0x0000FF);
//E
screen->Line(80, 420, 80, 480, 0xFFFF00);
screen->Line(80, 420, 240, 420, 0xFFFF00);
screen->Line(160, 420, 160, 480, 0xFFFF00);
screen->Line(240, 420, 240, 480, 0xFFFF00);
}
};
#include “game.h”
#include “surface.h”
#include //printf
namespace Tmpl8
{
// ———————————————————–
// Initialize the application
// ———————————————————–
void Game::Init()
{
screen->Line(160, 120, 80, 180, 0xff0000);
screen->Line(80, 180, 80, 300, 0xff0000);
screen->Line(80, 300, 160, 360, 0xff0000);
screen->Line(280, 120, 240, 180, 0x00ff00);
screen->Line(240, 180, 240, 300, 0x00ff00);
screen->Line(240, 300, 280, 360, 0x00ff00);
screen->Line(280, 360, 320, 300, 0x00ff00);
screen->Line(320, 300, 320, 180, 0x00ff00);
screen->Line(320, 180, 280, 120, 0x00ff00);
screen->Line(400, 120, 400, 360, 0x0000ff);
screen->Line(400, 360, 480, 300, 0x0000ff);
screen->Line(480, 300, 480, 180, 0x0000ff);
screen->Line(480, 180, 400, 120, 0x0000ff);
screen->Line(560, 120, 560, 360, 0xffff00);
screen->Line(560, 120, 640, 120, 0xffff00);
screen->Line(560, 240, 640, 240, 0xffff00);
screen->Line(560, 360, 640, 360, 0xffff00);
}
// ———————————————————–
// Close down application
// ———————————————————–
void Game::Shutdown()
{
}
static Sprite rotatingGun(new Surface(“assets/aagun.tga”), 36);
static int frame = 0;
// ———————————————————–
// Main application tick function
// ———————————————————–
void Game::Tick(float deltaTime)
{
// clear the graphics window
//screen->Clear(0);
// print something in the graphics window
//screen->Print(“hello world”, 2, 2, 0xffffff);
// print something to the text window
//printf(“this goes to the console window.\n”);
// draw a sprite
//rotatingGun.SetFrame(frame); rotatingGun.Draw(screen, 100, 100);
//if (++frame == 36) frame = 0;
}
};
is this good?
int coordinates_x[28] = { 60 , 0, 0, 0, 0, 60, 120, 120, 120, 180, 120, 180, 180, 180, 240, 240, 240, 300, 300, 240, 360, 360, 360, 420, 360, 420, 360, 420 };
int coordinates_y[28] = { 160, 160, 160, 320, 320, 320, 160, 320, 160, 160, 320, 320, 160, 320, 320, 160, 160, 240, 240, 320, 160, 320, 320, 320, 240, 240, 160, 160 };
int colour[4] = { 0xff0000, 0x00ff00, 0x0000ff, 0xffff00 };
int a;
for (int i = 0; i < 28; i+=2) {
if (i < 6) {
a = 0;
} else if (i <= 13) {
a = 1;
} else if (i Line(coordinates_x[i], coordinates_y[i], coordinates_x[i + 1], coordinates_y[i + 1], colour[a]);
}
struct Line {

    int x1;

    int y1;

    int x2;

    int y2;

    int color;

};
const Line Message[] = {
// C
{0, 160, 80, 160, 0xff0000},
{0, 160, 0, 400, 0xff0000},
{0, 400, 80, 400, 0xff0000},
// O
{160, 160, 240, 160, 0x00ff00},
{160, 160, 160, 400, 0x00ff00},
{240, 160, 240, 400, 0x00ff00},
{160, 400, 240, 400, 0x00ff00},
// E
{320, 160, 320, 400, 0x0000ff},
{320, 160, 380, 160, 0x0000ff},
{380, 160, 380, 180, 0x0000ff},
{380, 180, 400, 180, 0x0000ff},
{320, 400, 380, 400, 0x0000ff},
{380, 400, 380, 380, 0x0000ff},
{380, 380, 400, 380, 0x0000ff},
{400, 180, 400, 380, 0x0000ff},
// D
{480, 160, 560, 160, 0xffff00},
{480, 160, 480, 400, 0xfffff00},
{480, 280, 560, 280, 0xffff00},
{480, 400, 560, 400, 0xffff00},
};
for (const Line& line: Message)
{
screen->Line(line.x1, line.y1, line.x2, line.y2, line.color);
}